Getting started
Scenum.io
Knowledge Base Technical Support
Register on the official Scenum website and claim your trial period. Activate your account after registration and log into it using the data you have received via email. Download and unpack into a separate folder the extension from the email.
After this your Scenum account is ready to go (read more about it in our Knowledge Base — Beginning of Work). This is what it looks like initially:
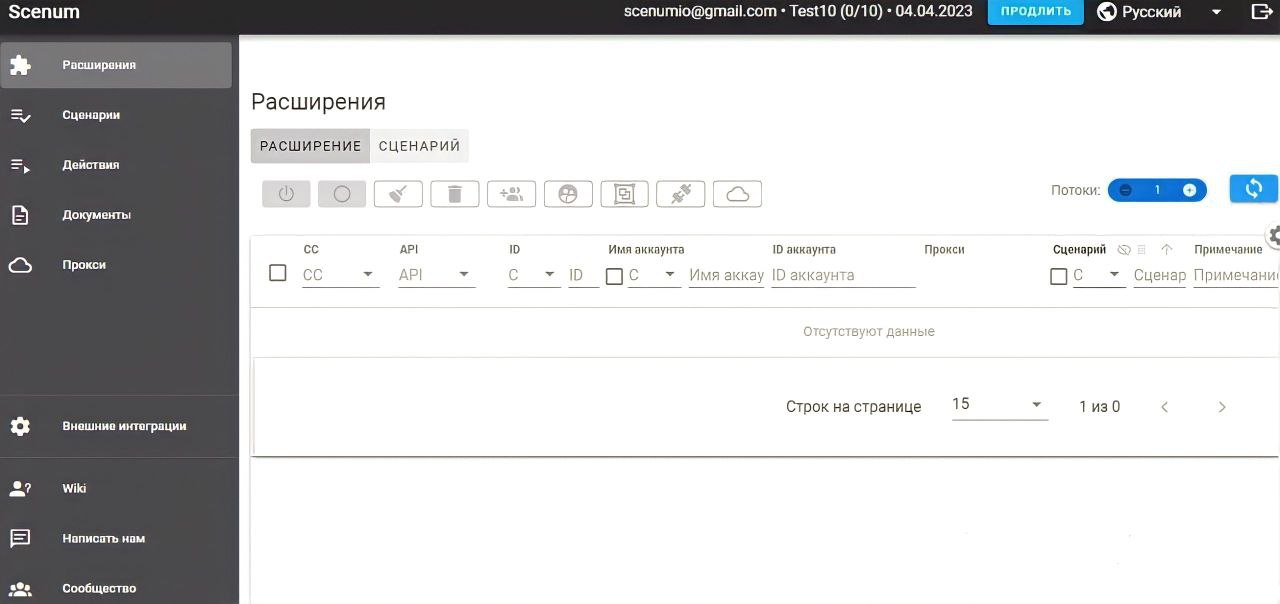
Now you need to add the extension to your multi-accounting browser profiles, after which they will be displayed as separate entries in the Extensions tab of your account, from where you will be able to control the extensions installed into browser profiles.
Octo Browser
Knowledge Base Technical Support
Register on the octobrowser.net website and look for further instructions in an email that will be sent to you. After registering, download the current version of the Octo Browser installer for your OS from the official website.
IMPORTANT: Do not change the installation path. In order to function correctly, Octo Browser needs to be installed into the default folder (C:\Program Files\Octo Browser for Windows).
After installation and activation choose your Subscription plan (if you would like to use API for connection purposes, select Base or higher), and if you’ve been using Octo Browser before, do not forget to update it to the latest version in order to enjoy full API integration functionality.
And if you’re a new user, don’t forget to use our promo code to claim 7 days of Base subscription free of charge.
Creating profiles and adding the Scenum extension
Next, we need to create profiles and add the Scenum extension to them. There are two types of profiles in Octo Browser: you can either create a new profile where you can configure the settings manually, or you can use the Quick Profile function to create a profile in one click. You can learn more about profiles and their functionality in the corresponding section of the Octo Browser Knowledge Base.
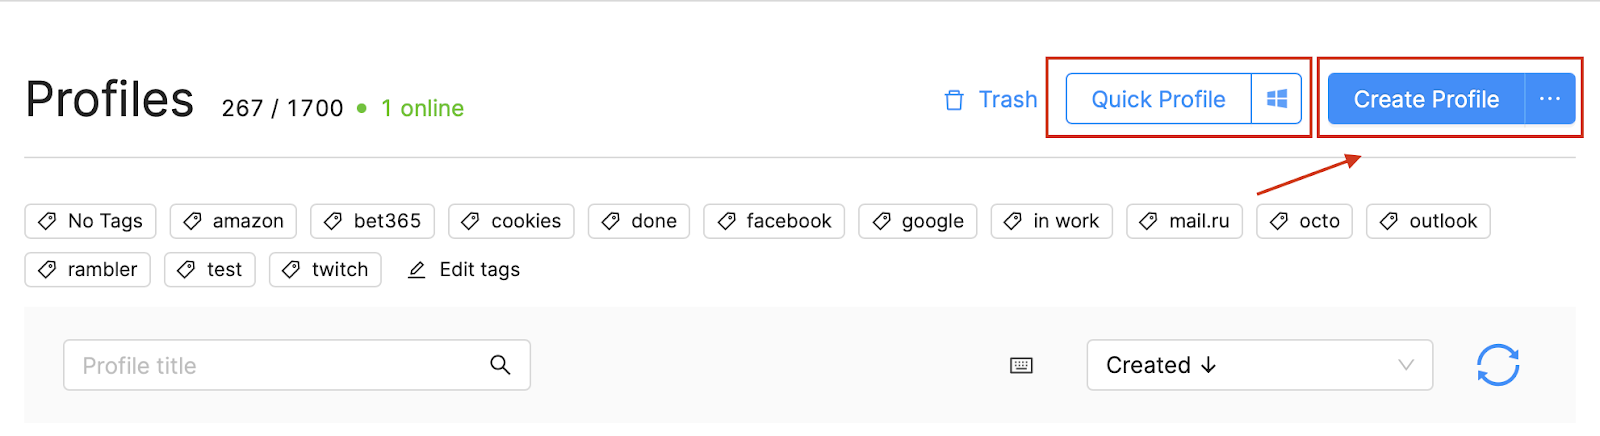
- Click on Create Profile.
- Give your profile a name.
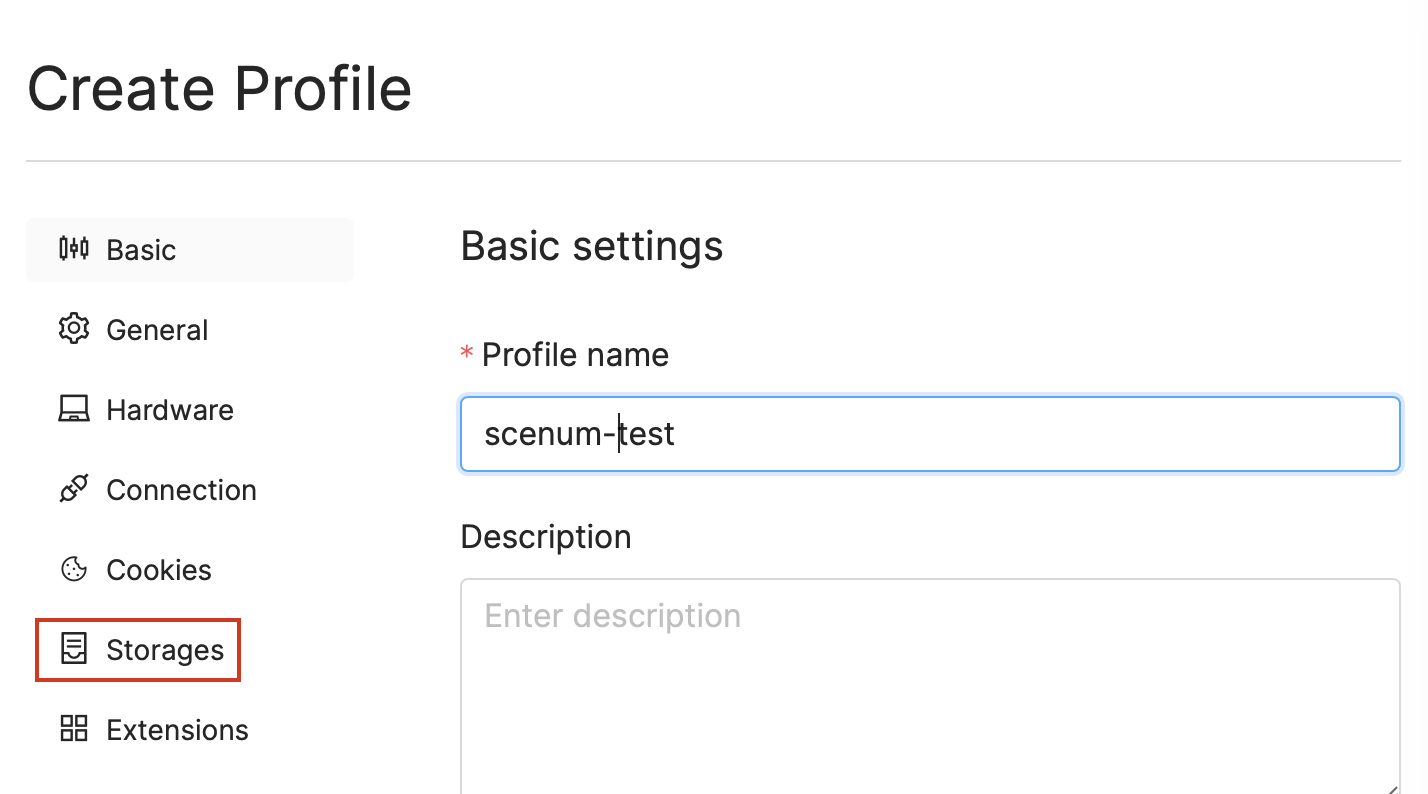
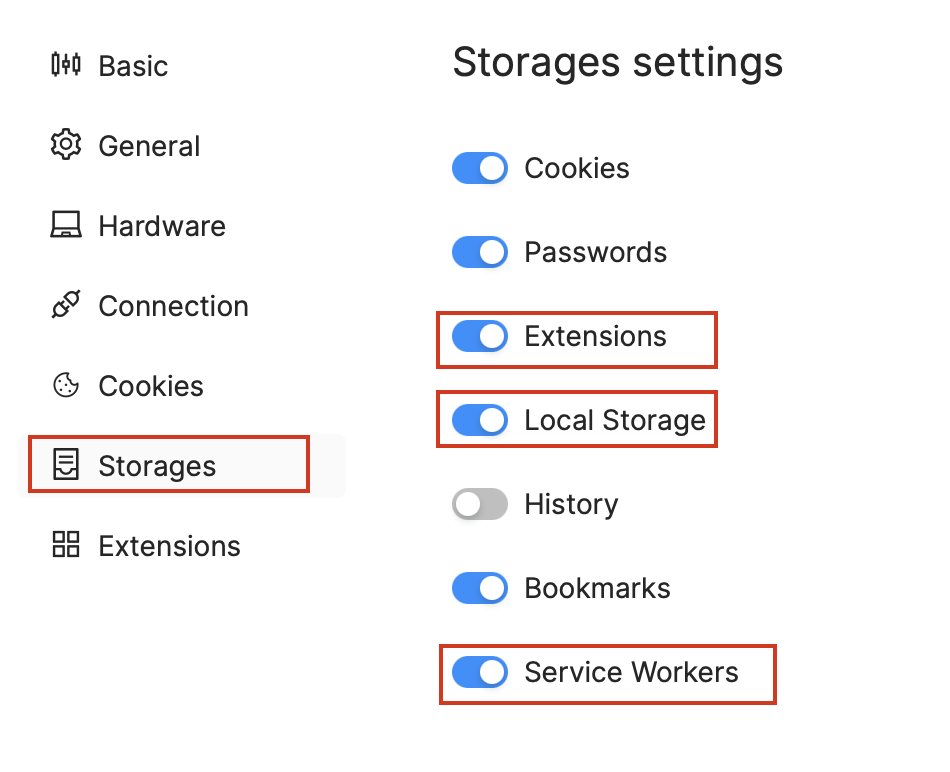
- Enable Extensions, Local Storage, and Service workers in the Storages settings.
- Click on Create Profile in the bottom right corner, and your profile is ready.
- Launch the profile by clicking on Start.

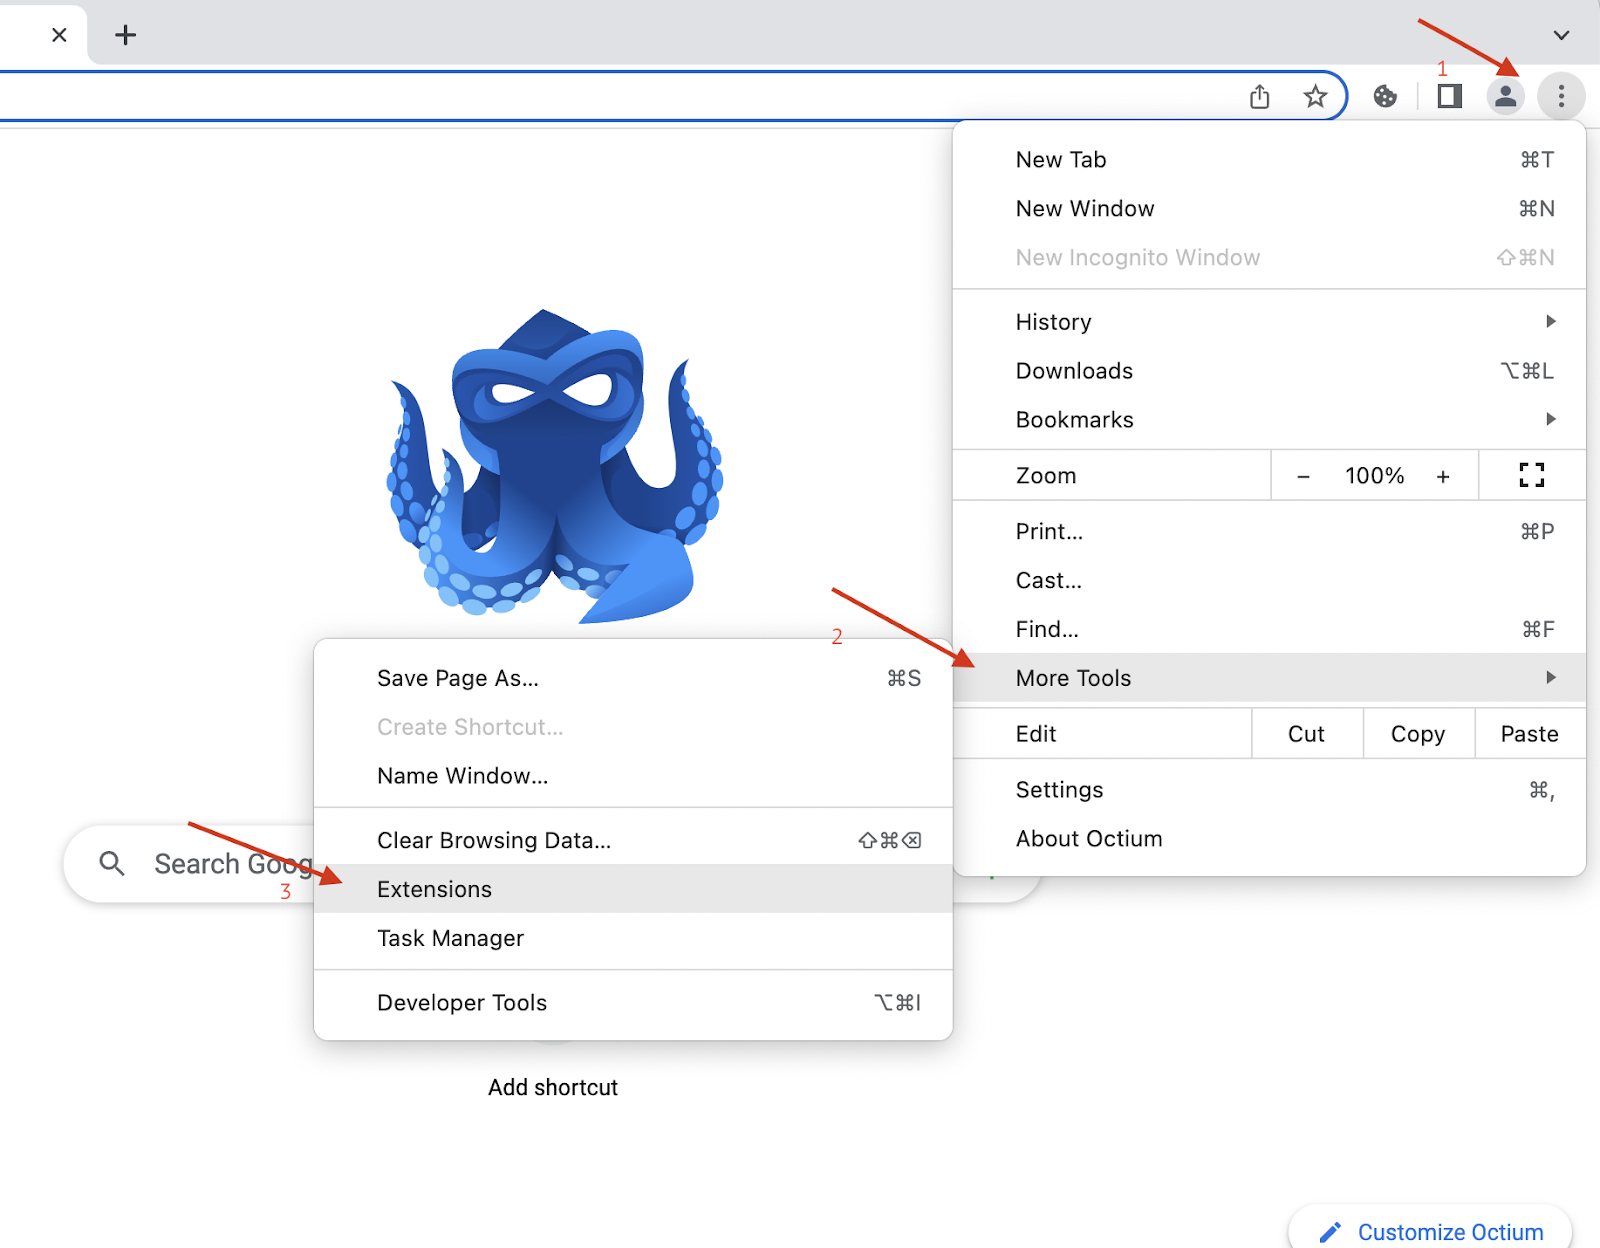
- In the running profile click on the vertical ellipsis in the top right corner → More tools → Extensions.
- Toggle the Developer mode on.
- Load the unpacked extension (the one you have saved in a separate Scenum folder on your desktop previously).

- You will see the extension tab.
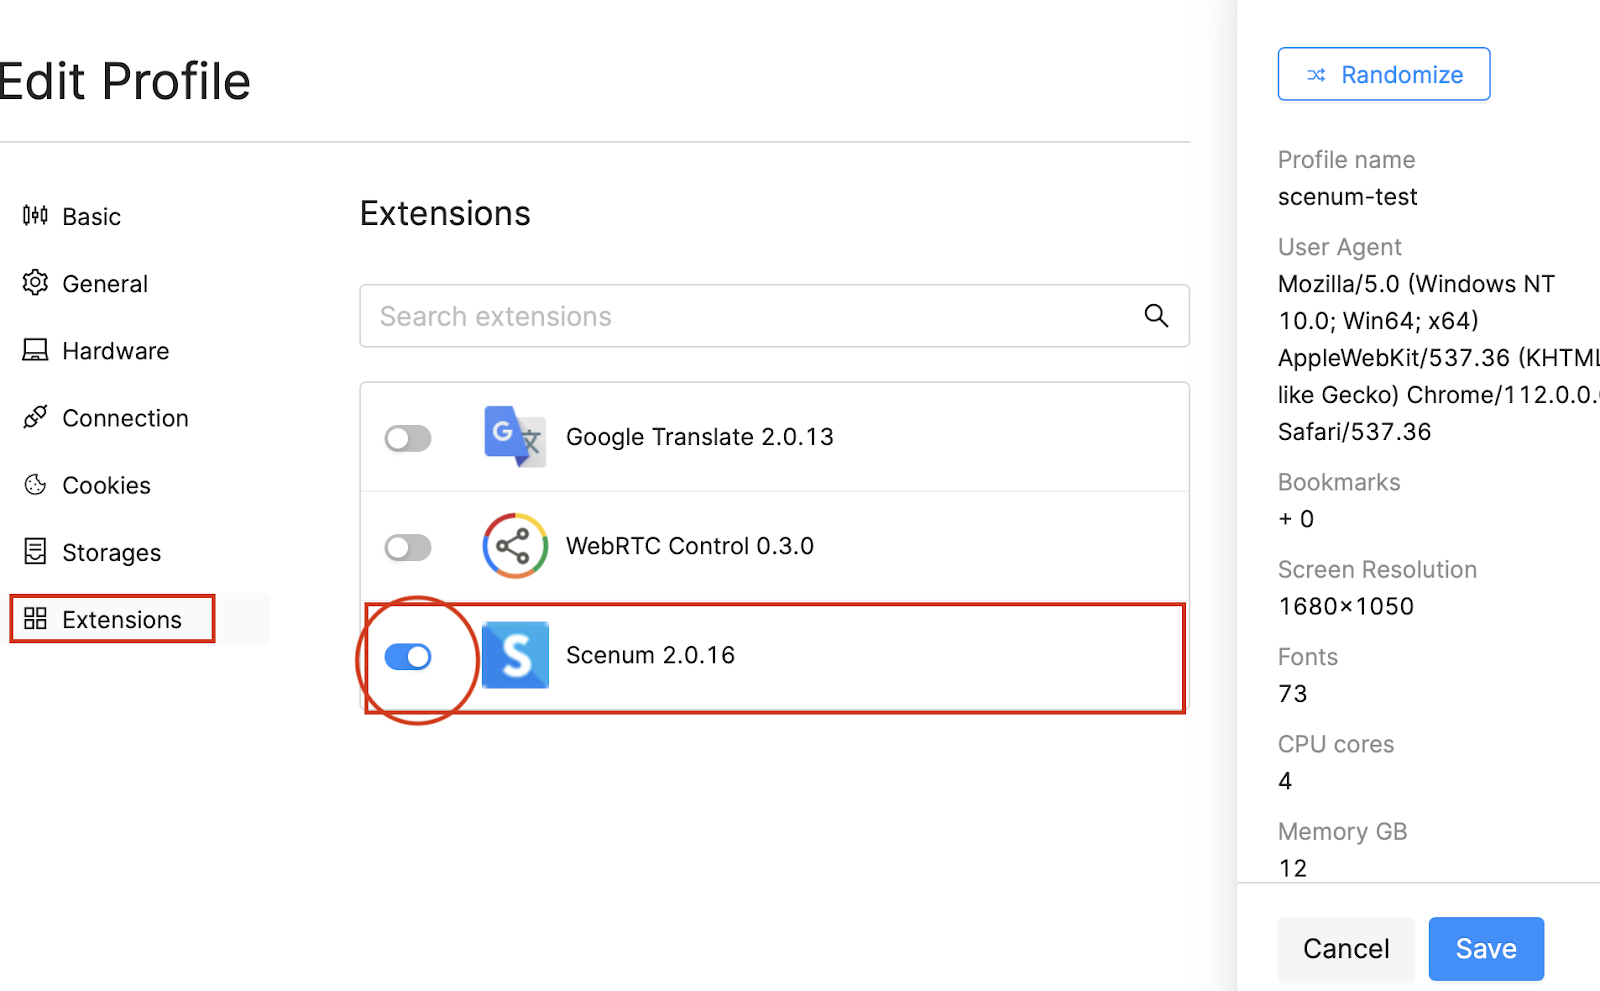
- After installation the extension will be turned on and appear in the profile settings and on the Extensions list.
Important: In the future you do not need to install the extension again when creating new profiles; you only need to activate it in the Settings.
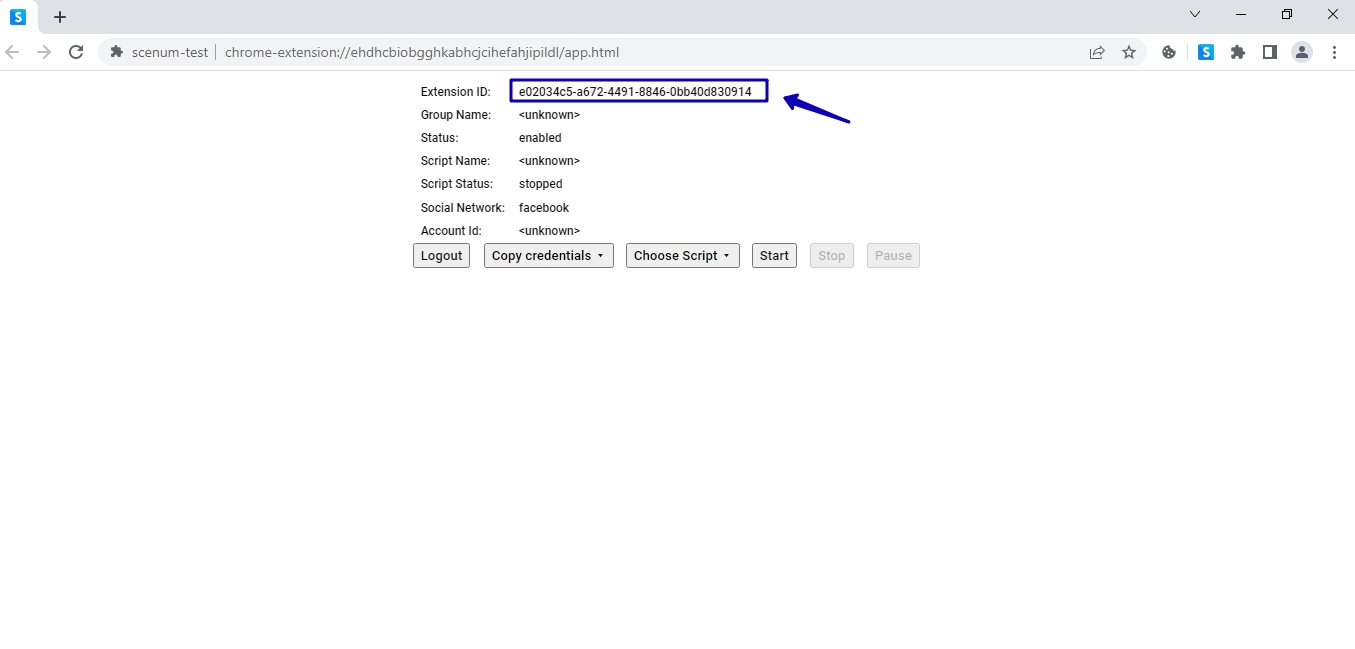
After launching a profile with the installed extension, you will see a line corresponding to that profile’s extension in your Scenum account.

This is how you can create a profile and add the Scenum extension to it. But what to do if you need to create a large number of profiles running Scenum? Of course, you can always create new profiles and activate the extension for them manually one by one, but why go through all this trouble if Octo Browser offers you the template functionality that you can use? Let’s explore this in more detail.
Profile templates
A template is a sample profile that allows you to quickly create profiles with the parameters you need. In order for extensions to appear in a template, you need to add them to any profile following the procedure described above. Let’s see how we can create a template and profiles from that template.
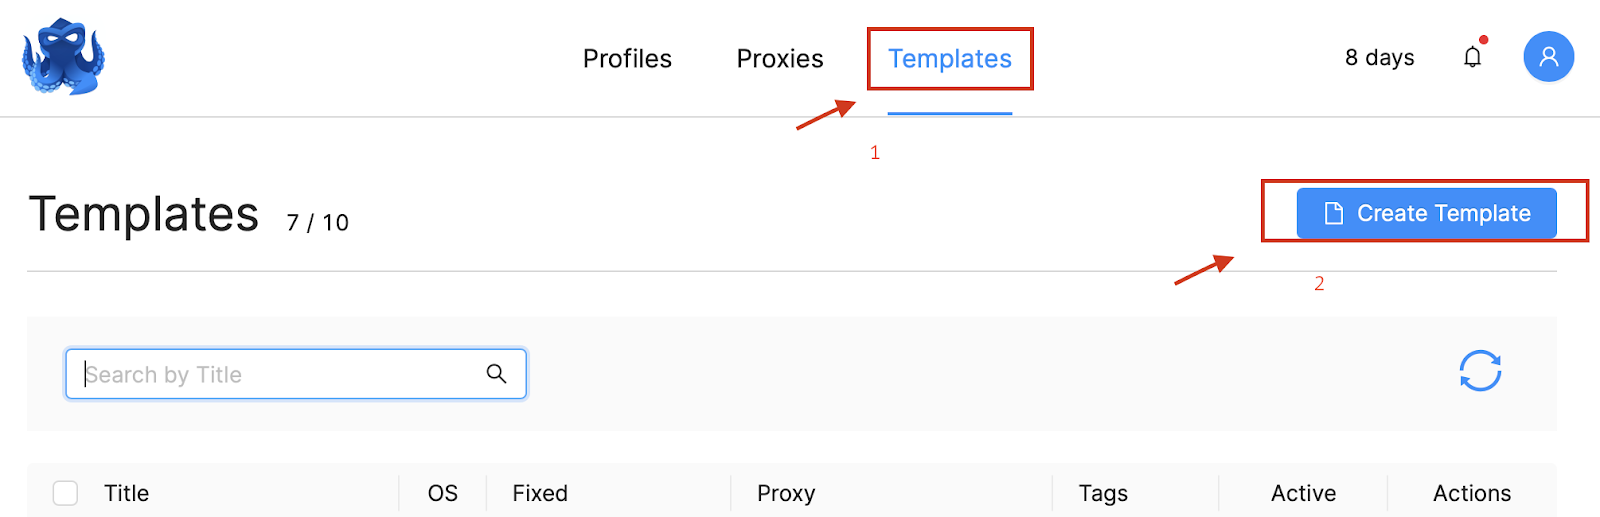
First, go to the Templates tab.
- Click on Create Template.
- Give your template a name in the Basic tab.
- Enable Extensions, Local Storage, and Service workers in the Storages tab.
- Enable the Scenum extension in the Extensions tab.
- Click on Create Template in the bottom right corner.
- Set the template to Active in the Template list and you’re all set.

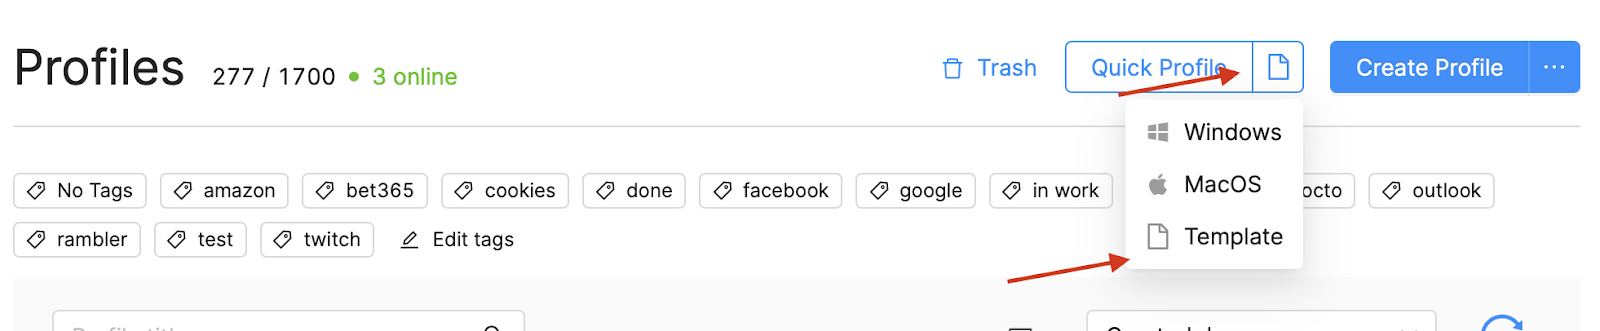
Now instead of performing all these steps each time you can simply click on Quick Profile → Template, and the resulting profile will be created with the selected template settings. When a template is active it is used by default, and its settings will also be applied if you make a profile using the Create Profile function.
Integration
Automatic integration is one of the main advantages of automatization. It allows you to automatically link extensions with multi-accounting browser profiles using API, and saves a lot of time otherwise spent on manual tweaking. This means that after configuring the necessary parameters, you can manage all your extensions in one click using your personal Scenum account.
In order to connect to Octo Browser using API you will need to perform certain actions on your router and PC, namely, you’ll need to set up port forwarding on your router and open the port on your PC, after which you’ll need to set up automatic integration.
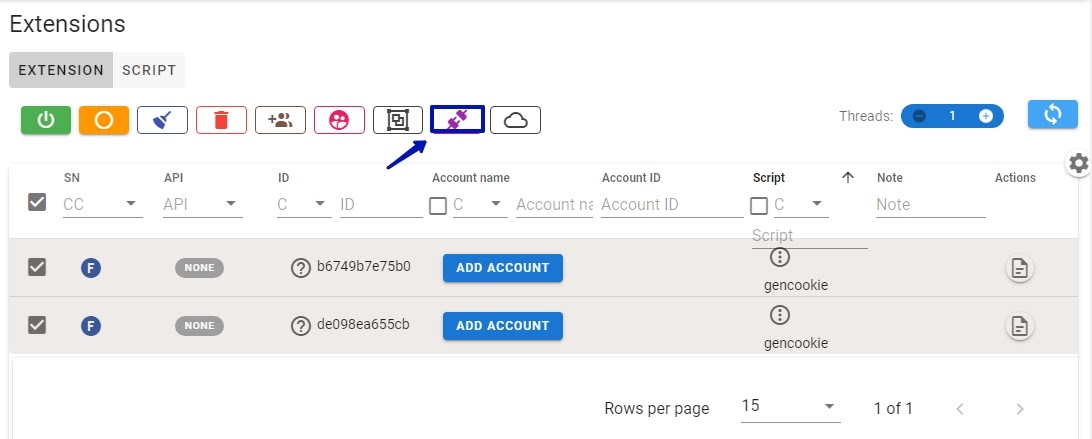
- Select all profiles in your account.
- Select automatic integration.
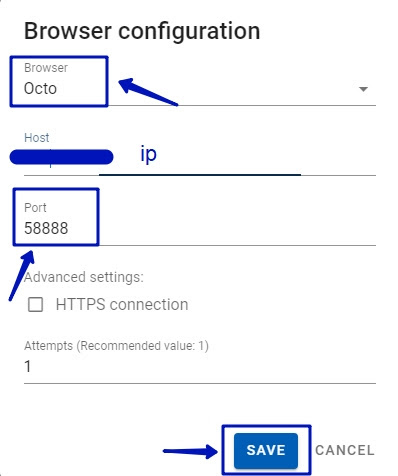
- Select Octo Browser.
- Specify port and host.
`
Following the steps in order during the integration process is crucially important. After the extensions are displayed in your Scenum account and you have gone through the automatic integration process, you’ll need to:
- Close all multi-accounting browser profiles,
- launch them again,
- refresh the account.
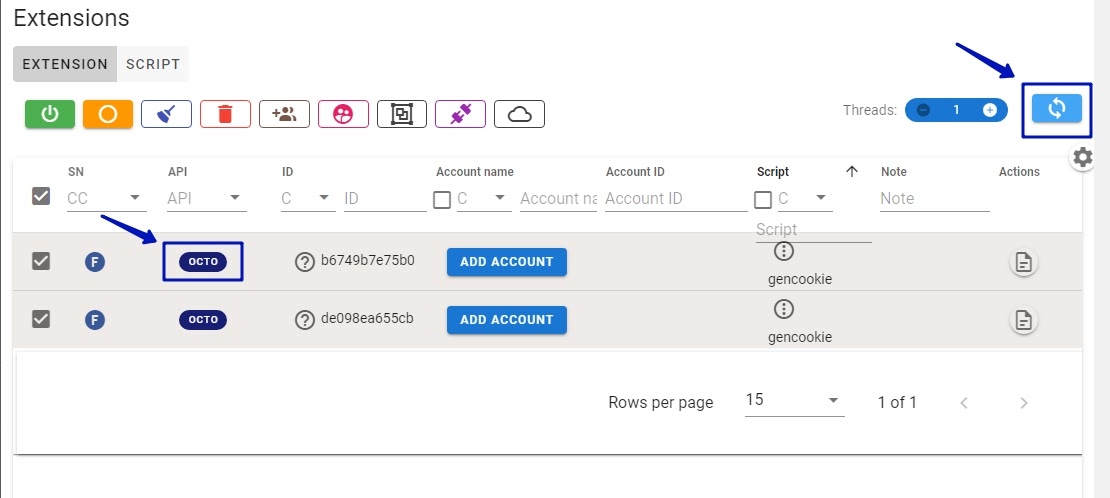
Click on the Octo icon after following these steps, and you’ll see that profile IDs have been collected automatically. Now you can choose a scenario for one or several profiles, select the number of threads (i.e., how many profiles will work simultaneously), click on Start, and just kick back and relax. The profiles will launch automatically according to the specified number of threads, the rest waiting for their turn. Once a profile finishes its tasks, the next one from the queue will launch and start working until the scenario is completed, and you do not have to lift a finger to make this happen.
Scenarios
Now that the profiles have been created and integration and other configuration procedures have been performed, the only thing that is left to do is to configure and run scenarios (don’t forget to consult wiki.scenum.io to find helpful information about their configuration).
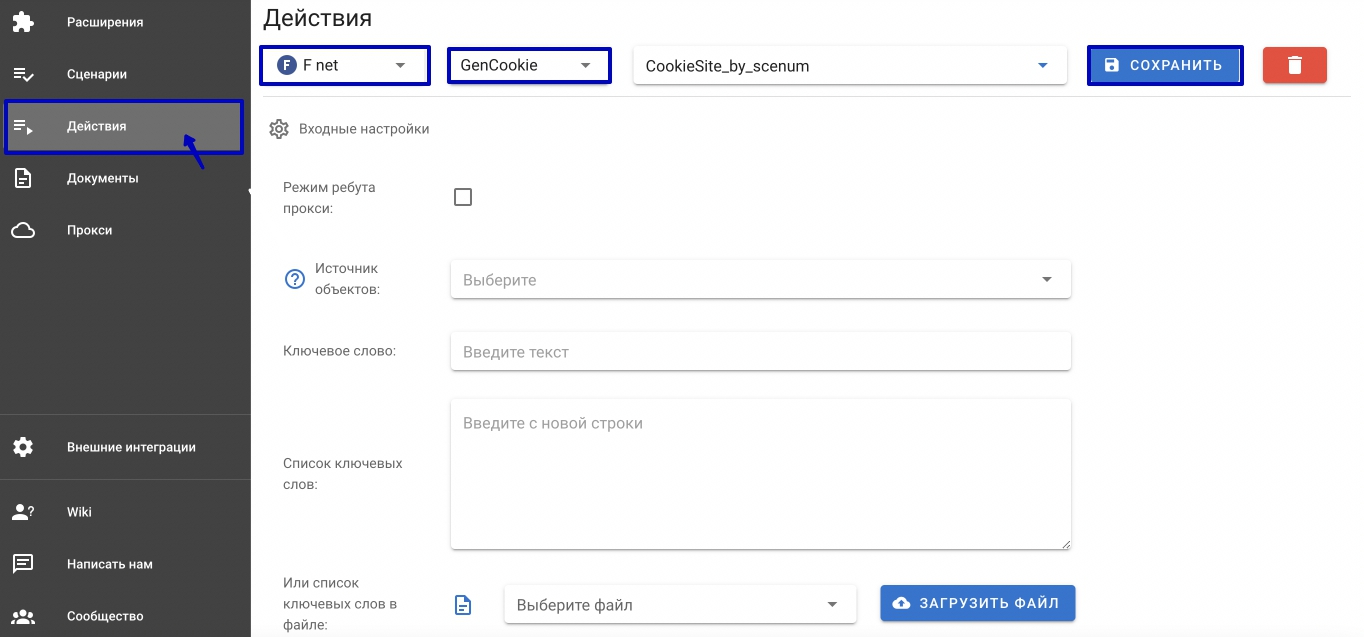
First, you will need to set up necessary actions.
- In the Actions tab choose the necessary social media and an action using the drop-down window.
- Configure the actions you need and save.
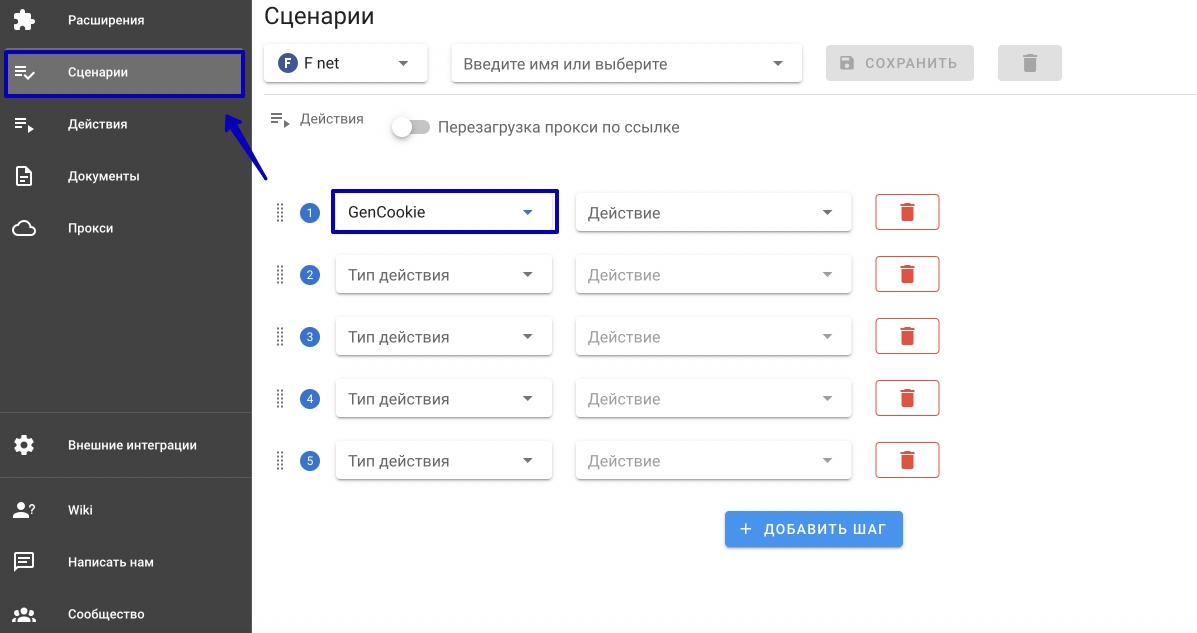
- Go to the Scenarios tab and choose the necessary social media.
- Add steps and select the action type.
- Provide a name and save the scenario.
Scenum has already created a scenario for 15-day farming. Simply contact Scenum Technical Support, and you’ll receive ready-made scenarios for free, the only thing left for you to do would be to adjust them according to your specific needs and run them. Of course, you can always edit all saved scenarios as well.
Octo Browser users can add proxies to profiles, and if you use mobile proxies, we strongly recommend changing the IP address using GenCookie (including in the Proxy Rebooting Mode) as the first action in all scenarios.
After this you can launch scenarios using your Scenum account and control all your Scenum extensions in one click. Clicking on Start/Stop will cause multi-accounting browser profiles to automatically open and close, and all saved scenarios can be run by any number of profiles chosen by you.
Extension Editing
And what if you need to add a new SMS service, connect a Telegram bot, add a Github token and so on? You’ll probably eventually want all this for enhanced efficiency with Scenum. Not to worry: Octo Browser stores all its extensions in one folder, so if you open any browser profile, find the path to the extension using our wiki tutorial, open credentials.json file, and provide all the necessary data, it will be added to all profiles simultaneously.
And that’s that — have fun exploring the automation of farming! Don’t forget to check out these useful article:
Automatic account registration on Facebook